
VHS tapes are keeping the moments from your family trips and weddings alive. They also face several risks, like crushing at the bottom of storage bins and even snapping in your VCR. Since we fix lots of damaged videotapes at EverPresent, we’re excited to show you how to repair broken VHS tapes.
Remember that your tapes are fragile and these fixes aren’t permanent. They’re just a way to get your home movies ready to digitize, or at least to preview before you decide to go digital on your own or with a video transfer service.
Written by: Jens Peterson
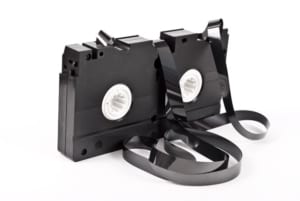
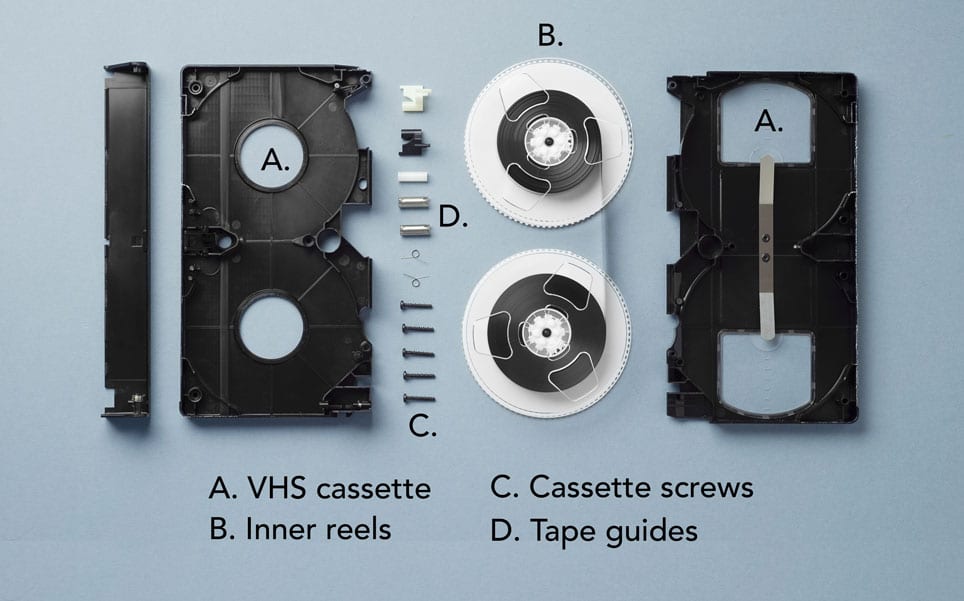 Dismantled VHS tape diagram
How to Repair VHS Tape That Won’t Play
While video tape damage can take several forms, most steps in the repair process are the same because the parts of a VHS tape are all the same:
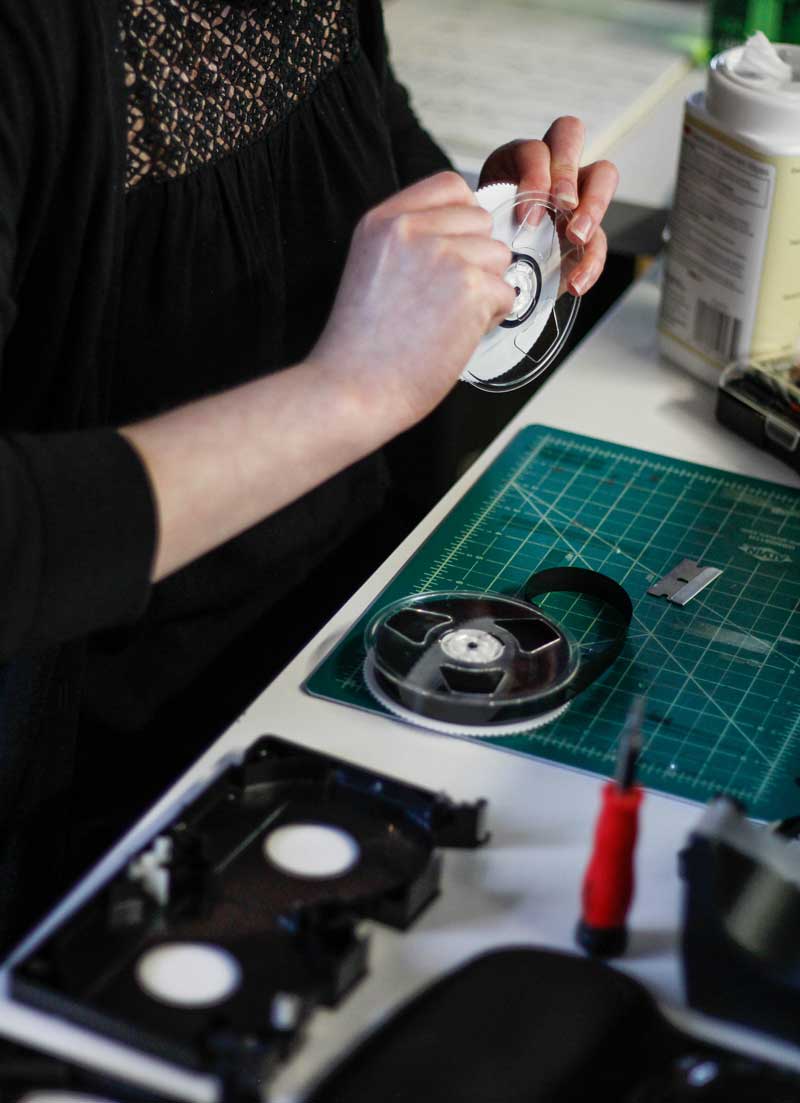
1. Open the cassette
- Remove any adhesive labels from the spine of your VHS cassette, or cut them along the cassette’s seam to save any handwriting.
- Use a Phillips head screwdriver to remove five screws from the back of the cassette. There should be one screw in each corner and a fifth near the center.
- Lay the cassette flat so the front is facing up, then gently wiggle the front half off of the bottom half.
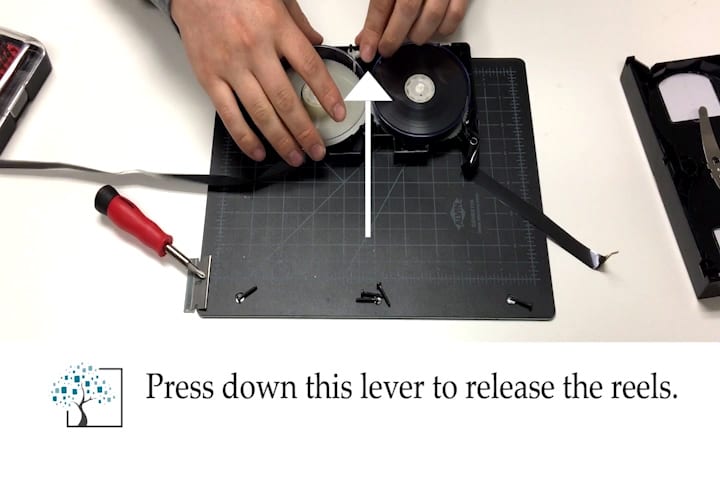
2. Remove the reels
- Press and hold the white lever at the bottom center of the VHS cassette. This lever unlocks the reels.
- While holding the lever in the ‘unlock’ position, remove both of the reels from the cassette.
3. Fix VHS Tape
For tape breaks and creases (from our video):
 Magnetic video tape is made with a plastic base material that gets brittle with time. The tape also faces friction as it winds through cassettes and against a VCR’s tape heads. Both factors cause some tapes to snap during playback.
Tape creases happen when snapping, slackening and broken leaders cause your VHS tape to wrinkle during playback, or even while handling if the tape is hanging out of a cassette. The wrinkling causes creases in the tape that can be visible during playback. Tapes with severe creases might not play at all. Some experts can apply pressure and low heat to smooth out some minor creases, but we don’t recommend trying this approach at home as you could damage the tape even more.
Luckily, you can cut off the frayed or wrinkled tape sections caused by breaking and creasing. Then you can reconnect the watchable portions with a technique called splicing.
-
- Use scissors or a razor blade to cut off the damaged section(s) so you have two reels of magnetic tape with clean-cut ends. Don’t cut too much – you only need to remove the damaged tape.
About every 1.5 inches of VHS tape equals one second of video in Standard Play (SP) mode, so as you remove more tape, you lose more watchable video. There might also be an awkward jump in footage from one scene to the next. - Get a two-to-three-inch piece of VHS splicing tape (regular Scotch tape is fine too) and lay it flat on your workspace with the adhesive side facing up.
- Use scissors or a razor blade to cut off the damaged section(s) so you have two reels of magnetic tape with clean-cut ends. Don’t cut too much – you only need to remove the damaged tape.
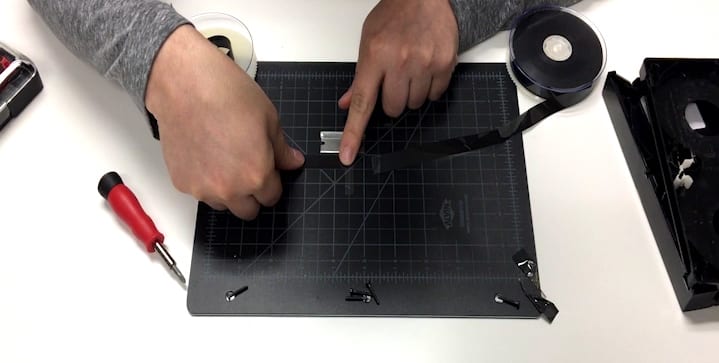
- Attach one end of your videotape to the splicing tape so the inner/underside of the videotape covers roughly half the width of the splicing tape.
- Carefully attach the second section of videotape to the other half-width of the splicing tape so both videotape ends are flush and reconnected along their freshly-cut seams. Even the cleanest tape splices will show up on your video as a minor blip between the images.
- Wrap the splicing tape around the videotape for a more secure splice, or just cut any remaining splicing tape that’s hanging off of the videotape.
Broken VHS Cassettes:
 Your VHS tapes are stored inside of brittle plastic cassettes held together with springs and screws. Sometimes the plastic breaks or the screws wear out. Not all broken cassettes merit repairs, and they might work fine if you manually pop them back into place.
The moveable flaps at the top of VHS cassettes break often. Tapes can still play without the flap, but they’re at a much higher risk of dust and other debris getting inside the cassette and affecting playback. There’s no one-size-fits-all method to identify which cracks are too severe to ignore – but if your VHS tape doesn’t play at all, a broken cassette could be the culprit.
- Get a replacement VHS cassette (you can find low-cost VHS shells here, or just steal a cassette from another VHS tape that you don’t want or need anymore).
- Repeat steps one and two to open the replacement cassette and remove the reels.
- Once you’ve removed the reels from your replacement cassette, take the reels of tape that you want to save and place them inside of the empty, unbroken cassette shell. (Step 4!)
Broken Leaders:
A leader is the clear part at the end of your videotape that attaches it to a reel. If a leader breaks, the tape is no longer attached to both spools and your home videos won’t play properly in a VCR.
- Locate the empty reel (the one that the leader broke from).
- Wrap Scotch tape around the hub (the inside core of the reel) a few times and leave two to three inches of tape exposed.
- Attach the leader to the adhesive side of the exposed tape.
4. Replace the reels
- Put the reels back into the VHS cassette shell.
- Wrap the magnetic tape back around the outsides of the shiny metal cylinders, called tape guides, at the top of the cassette. One of the metal guides has a smaller plastic cylinder, called a guide roller, right next to it – thread the tape between the outside of the tape guide and the inside of the guide roller.
- Use your hands to turn the reels and wind the excess tape back onto them as needed. The remaining tape that’s exposed between the reels should be taut, but be careful not to overwind it.
5. Close the cassette
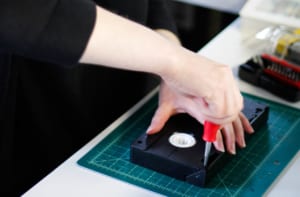
- Carefully place the cassette’s front half back into place and make sure it fits snugly.
- While holding both halves together, flip the VHS cassette tape over and lay it flat so the back side is facing up.
- Replace the five screws that you removed in step one.
What to Do if Your Broken VHS Tape Repair Doesn’t Work
If you made these fixes and your VHS tape still doesn’t work, it might be time to bring in a VHS tape repair service like ours. Video transfer professionals handle damaged VHS tapes all the time, so they’ll probably know how to bring yours back to life.
Still can’t get a tape to play? The problem could be your VCR and not a broken tape. Try playing a couple of different tapes – and consider finding another VCR if none of your videos play.
NOTE: You can also use the steps we covered here to repair 8mm, Beta, miniDV and VHS-C tapes. These tapes and cassettes are smaller, so you might need a smaller screwdriver and repairs could be more tedious. Some of the internal components and the number of screws may vary, and some tape formats like 8mm and miniDV are more sensitive to repairs so precise splicing is more important than for VHS. Yet all of these videotape cassettes essentially work the same way.
Having a video digitizing service provider repair your old tapes might be your best option, especially if you plan to digitize VHS tapes and other family memories anyway. We’d love to help you repair these tapes and convert them to digital, so get in touch today!
Have a VHS tape repair needed
before you digitize?
Share us on Pinterest!