
In the first part of this series, for everyone interested in diving into organizing your family memories, we gave a high-level overview of how to choose an organizing structure, pick your favorites, and we even covered digital versions of organizing via metadata. Now, we’re going to tell you everything you need to know on an individual format level (i.e. photo albums vs. 35mm slides). Anything those closets, attics and dusty bins have waiting for you we have almost certainly covered here. We’ll tell you what they are, and let you know if you can safely DIY digitize them or whether it’s best to use a professional service.
Let’s get started.
Organizing Albums & Scrapbooks
for Digitizing
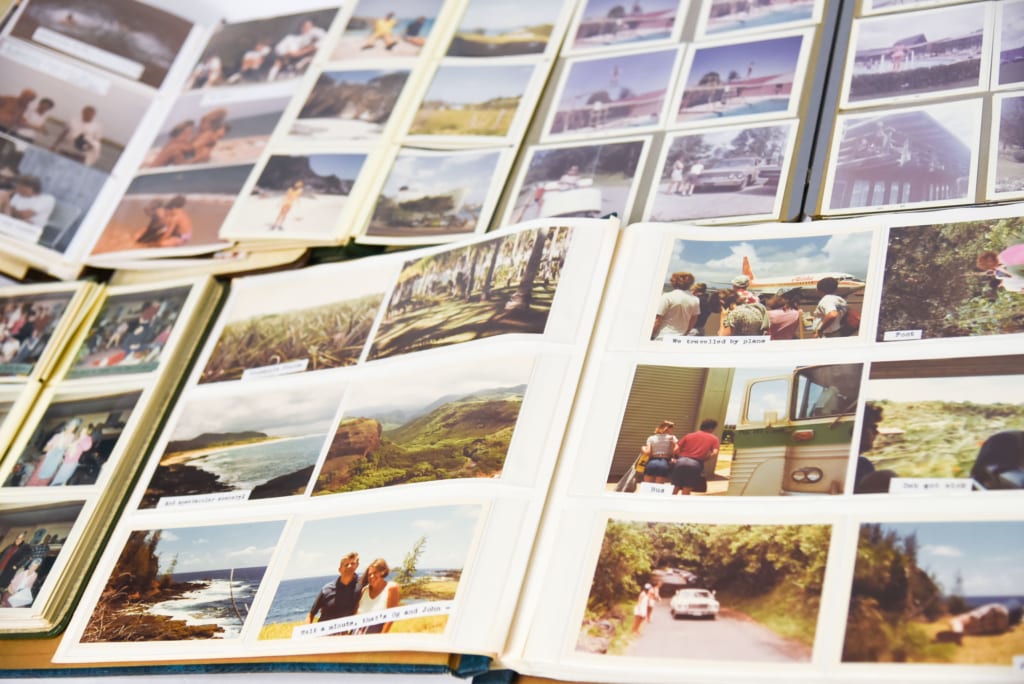
The value of an album or scrapbook is greater than the sum of its parts. Each one is a unique collection of items that might seem disconnected but come together to tell a story.
Amy, the Director of our Photo & Digital Organizing departments,
“In terms of albums and what to scan, I would always advise that people elect to scan the “complete story”. Seeing the images digitally will remove some context so it’s important to scan anything that gives hints of the times, people, and circumstances that prompted recording that memory in the first place. Loose items in albums [like tickets, newspaper clippings, etc] will be scanned at the spot they are found in, so if it only corresponds with a specific page or section of the album, try to fix it to the correct page.”
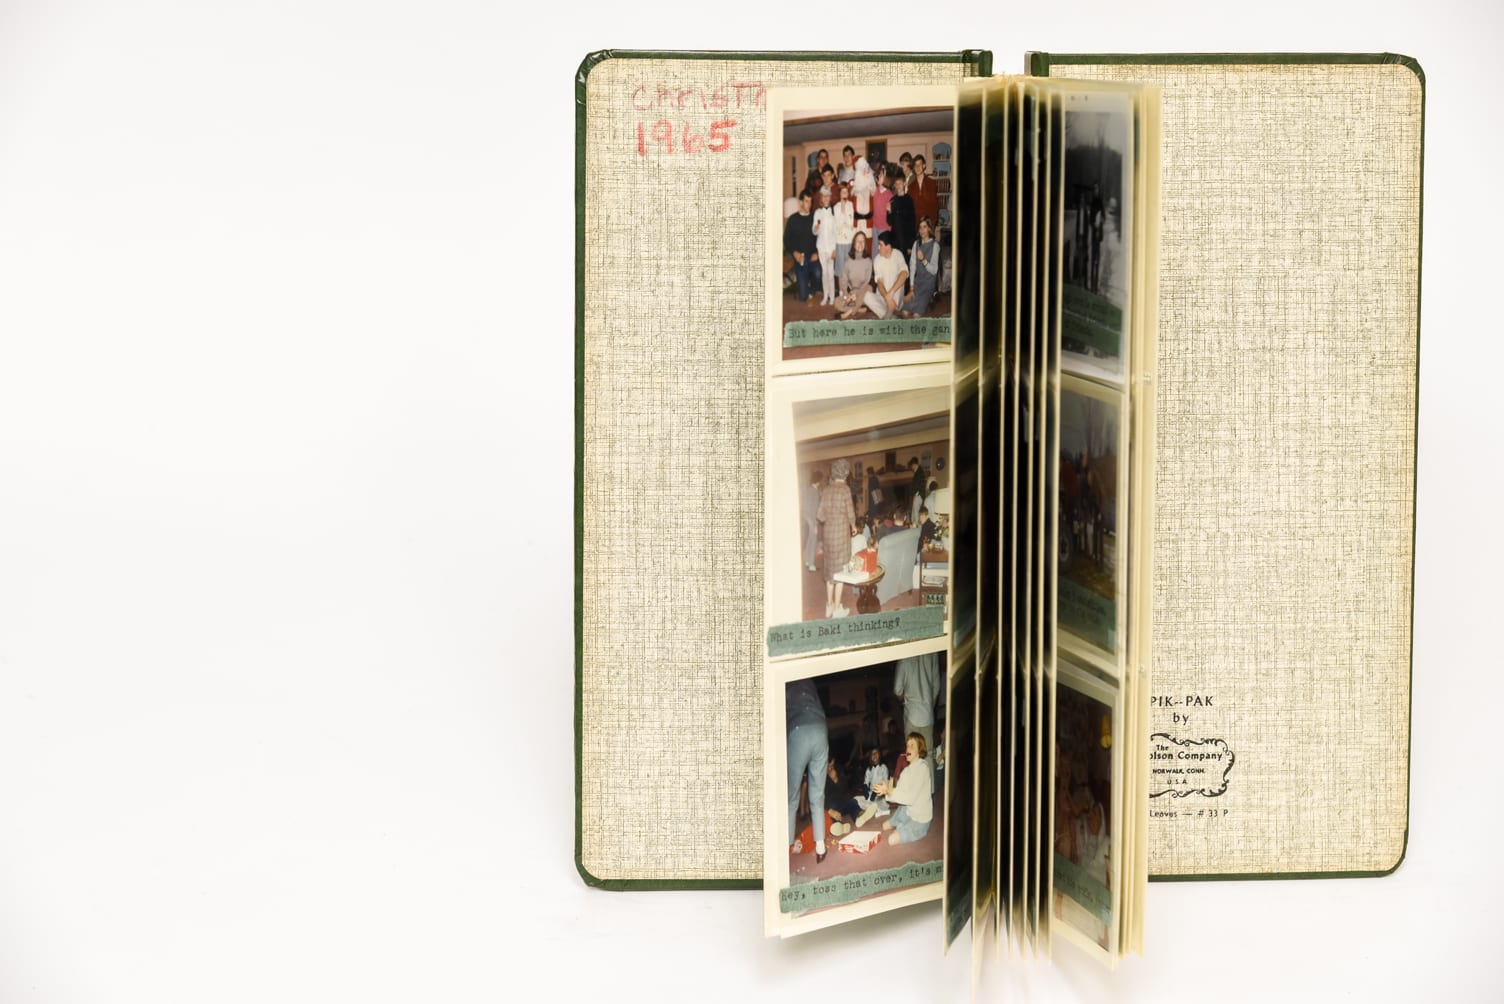
No album is created equally! Scrapbook and photo album formats have a lot of similarities, but they’re so popular that they come in a variety of sizes and materials and you have several important decisions to make as you’re sorting depending on the type of album you have.
 Individual scans – Remove each photo from the album, clean it, scan it, and put it back exactly where it was.
- This method works if you want the album’s contents kept in order, but aren’t concerned about scanning the original layout on every page. You can also keep the photos outside of the album stored in a separate bag or box to conserve space. Best for:
 Sleeved albums – plastic pages with transparent sleeves where photos are inserted
 Magnetic albums – also called ‘Sticky’ albums; photos are attached to pages covered with adhesive, then a plastic sheet protector folds over the entire page. If your photo is stuck do not try to force it out.
- You can easily remove the photos from these albums yourself rather than sending the album for digitizing. Keep the photos in groups by album or distribute them to your more specifically organized groups like family or year. Doing this means you will only pay a standard photo-scanning fee
- This method works if you want the album’s contents kept in order, but aren’t concerned about scanning the original layout on every page. You can also keep the photos outside of the album stored in a separate bag or box to conserve space. Best for:
 Full-page scans – Many people want to preserve the album’s original layout. The folks who made these albums deliberately placed items on each page in a specific way. We offer sharp, full-page view images of every page in an album or scrapbook and we recommend full-page scans for scrapbooks especially. This method lets you appreciate the album in the same way that its creator intended, and it also preserves any handwritten captions next to the photos and other items. These captions can also be stored in the file names or metadata of their respective images.
- Vintage Scrapbooks – a classic scrapbook with sheets of black paper, to which photos and clippings are attached with photo corners and captions are written; sometimes bound with yarn or string laced through the spine.
- Modern scrapbooks – the same concept as vintage scrapbooks, but more diversity in sizes and materials
 Individual scans – Remove each photo from the album, clean it, scan it, and put it back exactly where it was.
 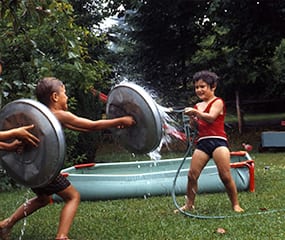 Sleeved albums
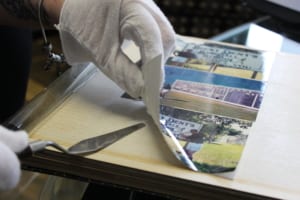 Magnetic albums
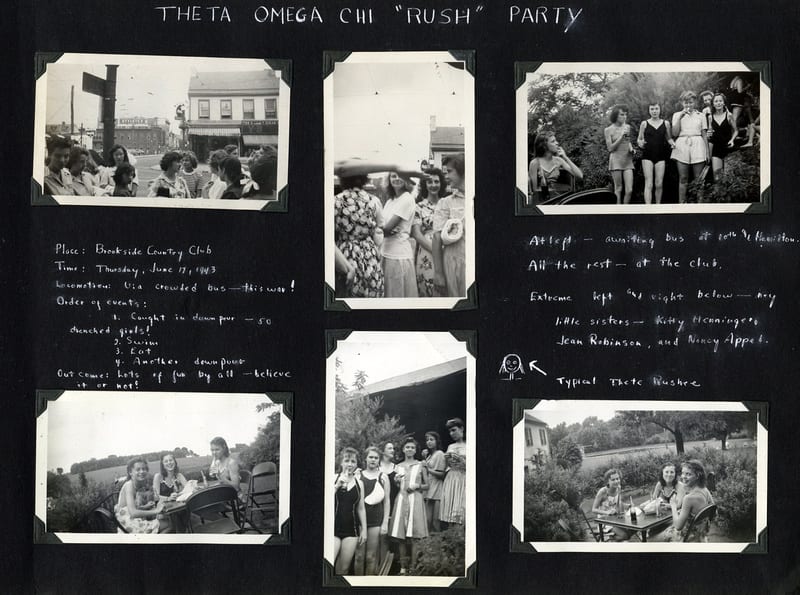 Full-page scans
You also have the option to do both! Preserve the layout of an album with full-page scans (and make a photobook) but also crop out the individual images for sharing and organizing. For a deep dive into your albums and scrapbooks, read our post, Albums & Scrapbook Revival – The Risks & Rewards of Preservation.

If you have large photos, oversized albums, full-page newspapers, or anything else you aren’t sure can be scanned, there’s an option for everything. Learn more about Scanning Large Photos & Oversized Albums here.
Organizing Printed Photos
(it’s the easiest)
The easiest win when organizing your family photos and videos are the standard photos you have in boxes and envelopes. They are durable, easy to sort and mostly a uniform size and shape. When those are done, this is where a lot of people give up because they don’t know how to handle everything else, but we can help.
Jaimie, one of our newest consultants, always offers this piece of advice to her clients,
“If the client has an assortment of standard photos they had printed from cvs/walgreens etc to seperate them from any older more fragile ones. That way when we estimate them the standard photos won’t be counted as delicate scans.”
The Difference between a Standard Scan and a Delicate Photo
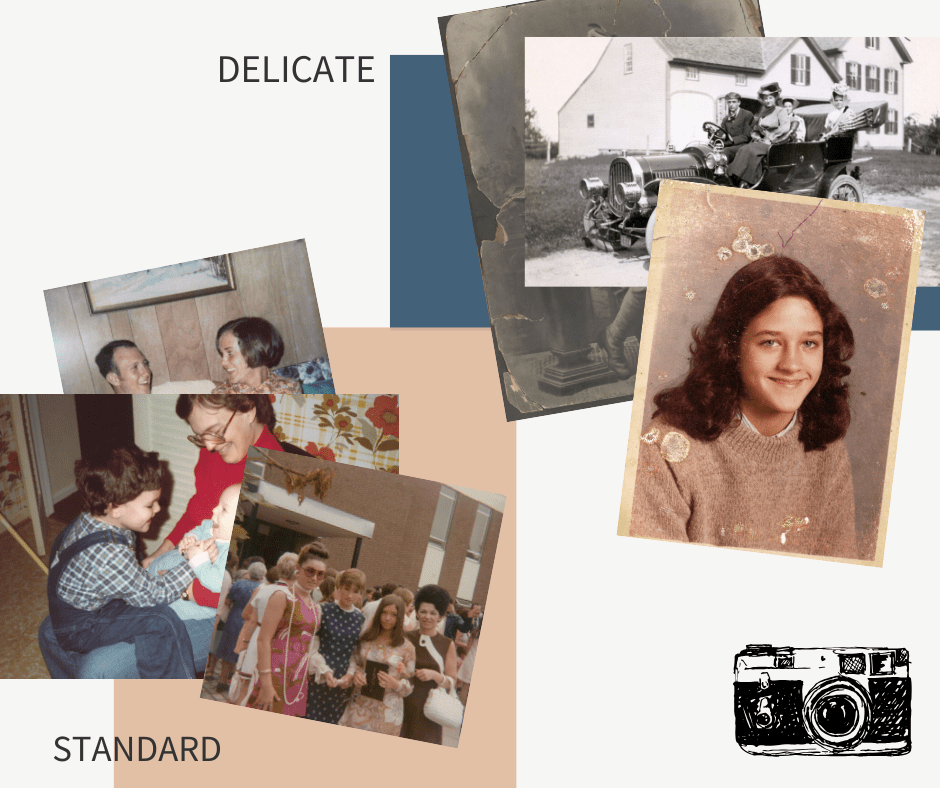
If you’re taking the time to be organized, perhaps by year or decade, this could be very straightforward. Your photos, likely anything prior to 1960, will be considered delicate scans. If you aren’t doing this kind of organization, just separating into standard v. delicate will help give you a sense of the cost of this project.
Delicate scans require a different method of scanning and a more experienced team member. These are the photos that are black and white with scalloped white borders; older curled photos, very small photos or any photo that is not in good condition.

Tips for working with vintage family photos:
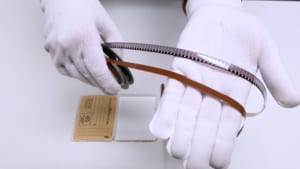
- Wear gloves. The older the photo, the more susceptible it is to damage.
- Separate groups of photos into archival safe plastic bags to keep them organized during digitizing.
- For long-term storage, invest in weatherproof containers and archival quality storage boxes
Home Organizing Slides
and other Negatives
All of the same tenets of photo organizing apply to slides and negatives, they are just harder to look at. You won’t be able to tell if a slide is blurry right away and it’s harder to discern smaller details but the broad strokes are still possible. Landscapes, anything too dark or too bright and buildings can all be easily set aside with a few tricks.
- Hold your slides up to the light or a bright window
- Invest in a cheap lightbox and you can review multiple slides at once
- Use your tablet or ipad! There are actually lightbox apps you can download to light up your screen. It functions the same as a normal lightbox, just smaller.
[su_note note_color=”#f4f5ab” text_color=”ffffff” class=”align: center”]TIP from our Digital Organizing Team: “If your rolls of 35mm negatives are curled or uncut, most places won’t do them, will charge a handling fee to keep them rolled, or will need to cut them. As you’re considering your negatives, decide which you prefer and choose the company who can handle them. “[/su_note]
If your negatives are undeveloped you’re not out of luck yet! We’ve put together a guide on Where You Can Still Develop Film and we’ll help you digitize after.
The Difference between a Standard Slide or Negative
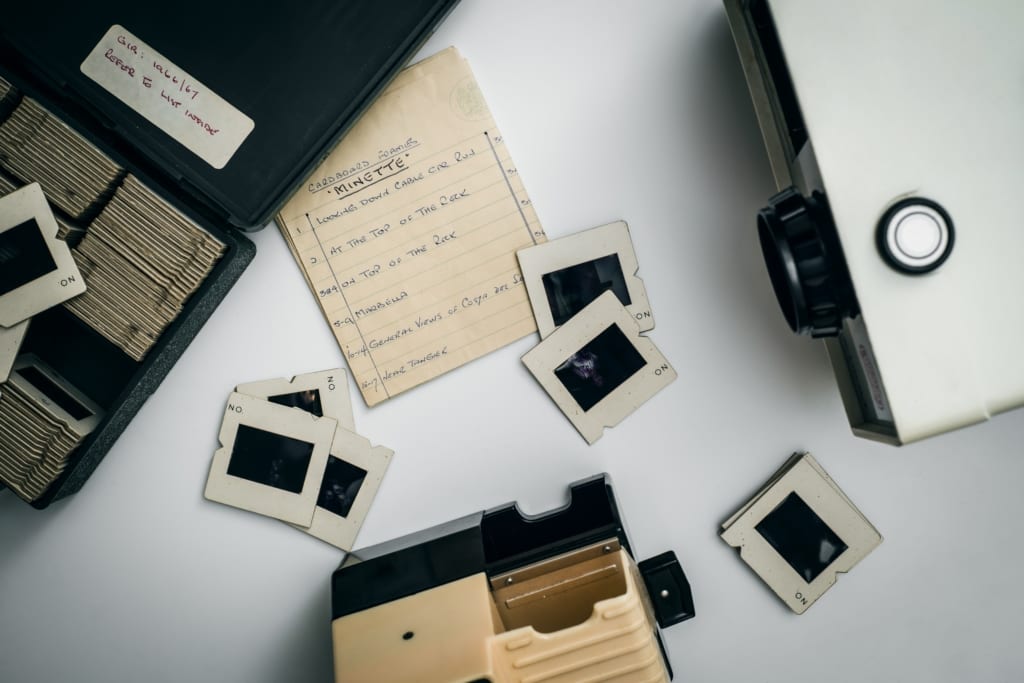
Many of the slides in a 2” x 2” cardboard mount with rectangular transparency are standard 35mm slides, as are most of the negatives that we see. These are easy to scan and are usually the same price as a standard photo scan. Once the sizes of the opening the cardboard, or as the size of the cardboard increases, the slides become very different formats and need to be handled in different ways.
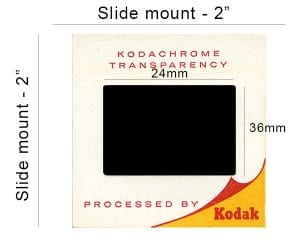
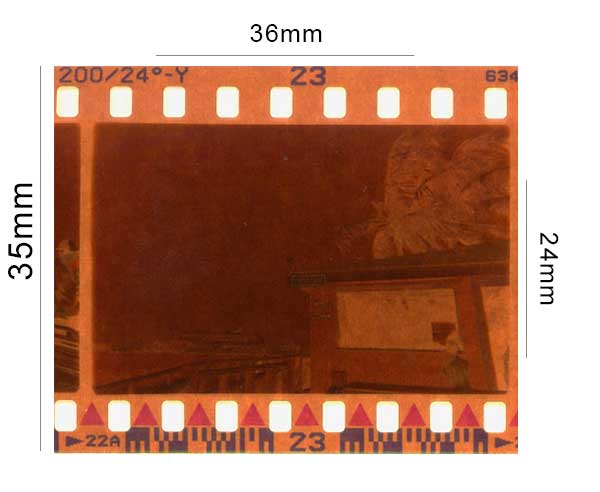
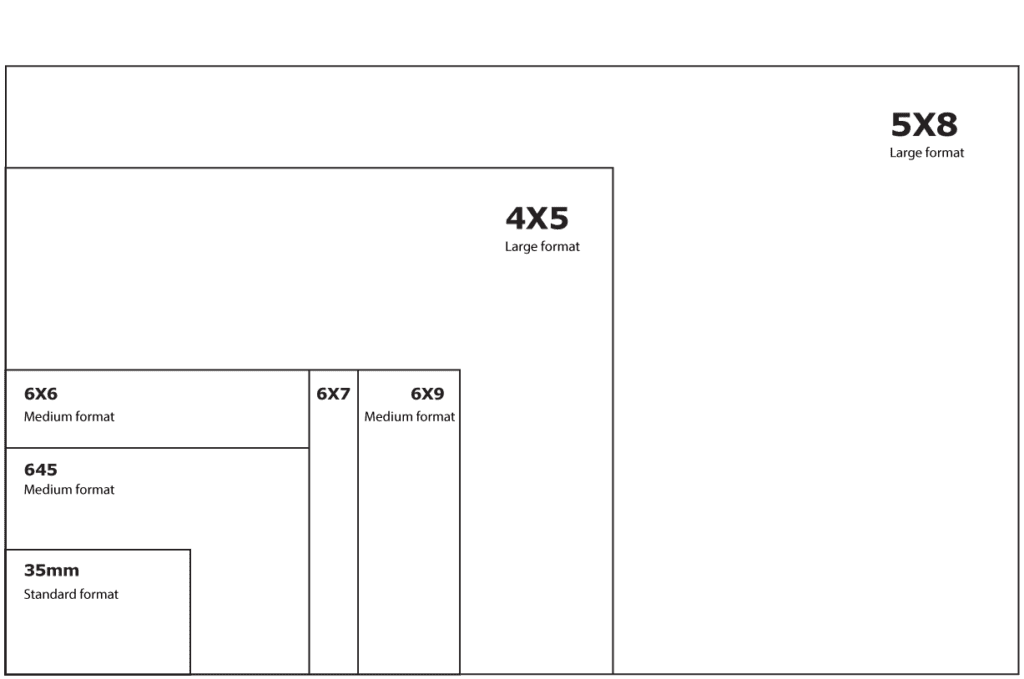
These are a standard 35mm slide and negative for easy reference. You can download a full photographic cheat sheet to negative formats here. Below is a sizing guide to determine if your negatives are medium format or large format.
Our ability to handle rare format transparencies like stereo slides, glass plate negatives and other non-standard negatives is unparalleled and we’ve written about them frequently. If you find yourself coming across a lot of these in your collection, here is a list of resources for you by format:
- TURNING YOUR 35MM SLIDES TO PRINTS AND DIGITAL
- UNDERSTANDING YOUR PHOTO FORMATS: STEREO SLIDES
- SHOOTING MEDIUM FORMAT FILM IN A DIGITAL AGE
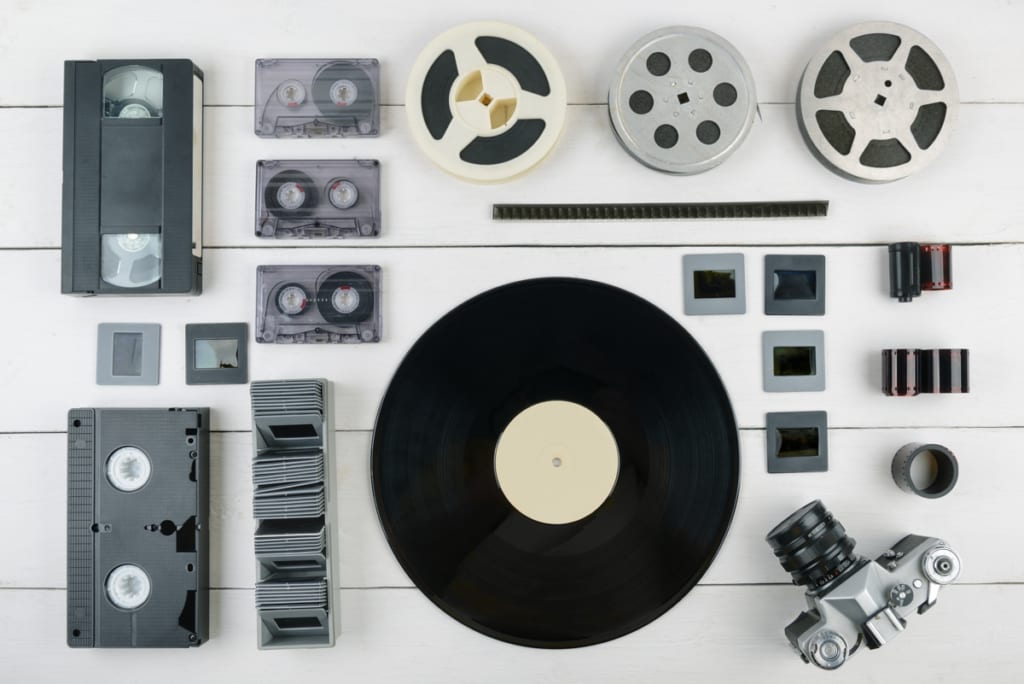
Organizing Video Tapes
and Film Reels
Unless you have a film projector or a VHS player, you can’t really preview these materials before deciding to digitize them. If you have an extensive collection of VHS tapes, you could choose to purchase a VCR before making the digitizing investment but even if you don’t, it’s still best to give them a thorough review as you’re going through everything!
 Check for mold. If your videotapes or film reels have a white coating on them or even a sprinkling of it, they have developed mold over time. This doesn’t necessarily mean they are seriously damaged or incapable of being digitized (although it’s possible), but we recommend getting those handled ASAP before it gets worse. Before you digitize, make sure you are working with a company capable of handling mold. All mold cleaning services are additional costs no matter where you go. We have a resource for identifying mold on both formats.
 Sound on film reels. What a rare blessing! Sound on film reels is not common but it’s very easy to look for. You should check at least a ⅓ of the reels in your collection for a thin copper strip that runs along the bottom. Most of the time, if any of your film reels have sound then they all do because of your family’s camera choices. We have a video guide to checking for sound on film reels you can visit.
 Check for mold
- Audio reels. It will be a shock to your budget if you send off 20 small boxes of what you think are film reels only to find out they are magnetic audio – it happens all the time. If you’re working with a company that can capture audio reels, it is a considerably more nuanced and advanced service and the price per reel is higher. Spot check your reels for whether or not they are pure audio. We have a guide for film v. audio reels here.
 Audio reels
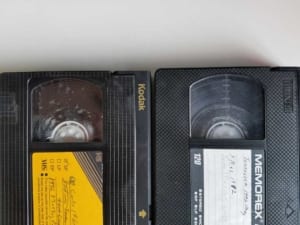
 Look for rare formats. Most people can recognize a VHS tape, and other standard formats like VHS-c, miniDV and 8mm tapes will say their names right on the tape. You should be on the lookout for anything that says Betamax or BetaCAM. These tapes are more expensive to digitize and not all places can work with them.
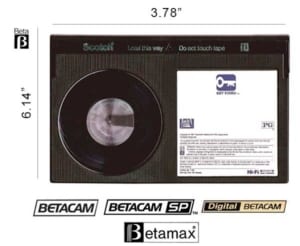 Look for rare formats.
  Don’t toss the broken tapes! A good digitizing service can repair tapes that wouldn’t normally be able to play again in a VCR or camera. You can try our tape repair guide to save yourself the repair fee but either way, don’t dismiss them!
 Don’t toss the broken tapes!
Video & Film Reel Labels
A great tip from one of our consultants, “Prepping videos [and film reels] with numbers for the order and what you prefer for titles, rather than just submitting with the titles written on them, that are usually really long and detailed is going to be a much better digital archive.”
What does she mean? A lot of tapes and reels have some version of a label or a year, or a very long and detailed description on the box. It’s a great idea to review those for content before sending everything to be digitized.
- If your tapes are not labeled with years but you can tell from the descriptions when they generally are, number them in the order they should go so they can be digitized chronologically
- Type out a list of labels for your tapes. This will ensure that no spelling errors are made during digitizing transcription. This is especially important if you would like the labels on your DVDs – we can’t read your Dad’s handwriting the way you can!
- Consolidate long labels down to the most important. There are limited characters available for both file names and DVD labels. Condense long descriptions into broad topics and dates.
- Sort out the TV only and professional videos! These are easy to identify and you should remove them before sending. Then you won’t be disappointed that a bunch of what you thought were home movies are actually professional footage and can’t be captured.
The more organized your video files are before digitizing, the easier it will be to review the digital files when they are complete! This will allow you to do more fun things with your videos, or share some of your favorite moments without combing through hours of footage.
If you find yourself not knowing what any of your tapes are because they have no labels, you can work with the digital .mp4 files to rename and reorder them!
By now, you know as much about the formats you have at home as we do. For continuous resources on digitizing, organizing, and all things related to family photos and videos, consider joining our list.

As we look outwards towards a new normal of continuing to stay at home while the country moves towards re-opening, now is the time to look towards the things you previously couldn’t imagine tackling. The photo albums on the shelves that are collecting dust, the bins in the attic full of letters, photos and film reels, the boxes of videotapes waiting to see the light of day – it’s all there for the taking (and the sorting).
Let us know if we can help. Stay well.