


Once you have gone through the process of scanning your photos at home, you might be wondering what’s next. After years being stored in boxes or albums, it’s likely that your pictures might not look their best anymore. From dust to color fading, photos deteriorate over time but you don’t need to be a Photoshop wizard to improve the condition of your family pictures.
While professional programs like Adobe are great, they have a lot of tools that wouldn’t be utilized by the amarteur photographer, and are also quite pricey. Oftentimes the photo software that comes with your computer provides all the tools needed for basic editing.
In this article we show you how you can use the simple software that comes with your Windows computer to enhance the look of your scanned photos. This guide is built to visually walk you through basic optimization of your photos step by step using only the applications that are already built into your PC.
HOW TO EDIT YOUR PHOTOS
Basic optimization is a term used to describe edits that can be done to enhance your photos without dramatically changing the look of the image. Usually it involved basic fixes to exposure and contrast and minor color adjustments as necessary.
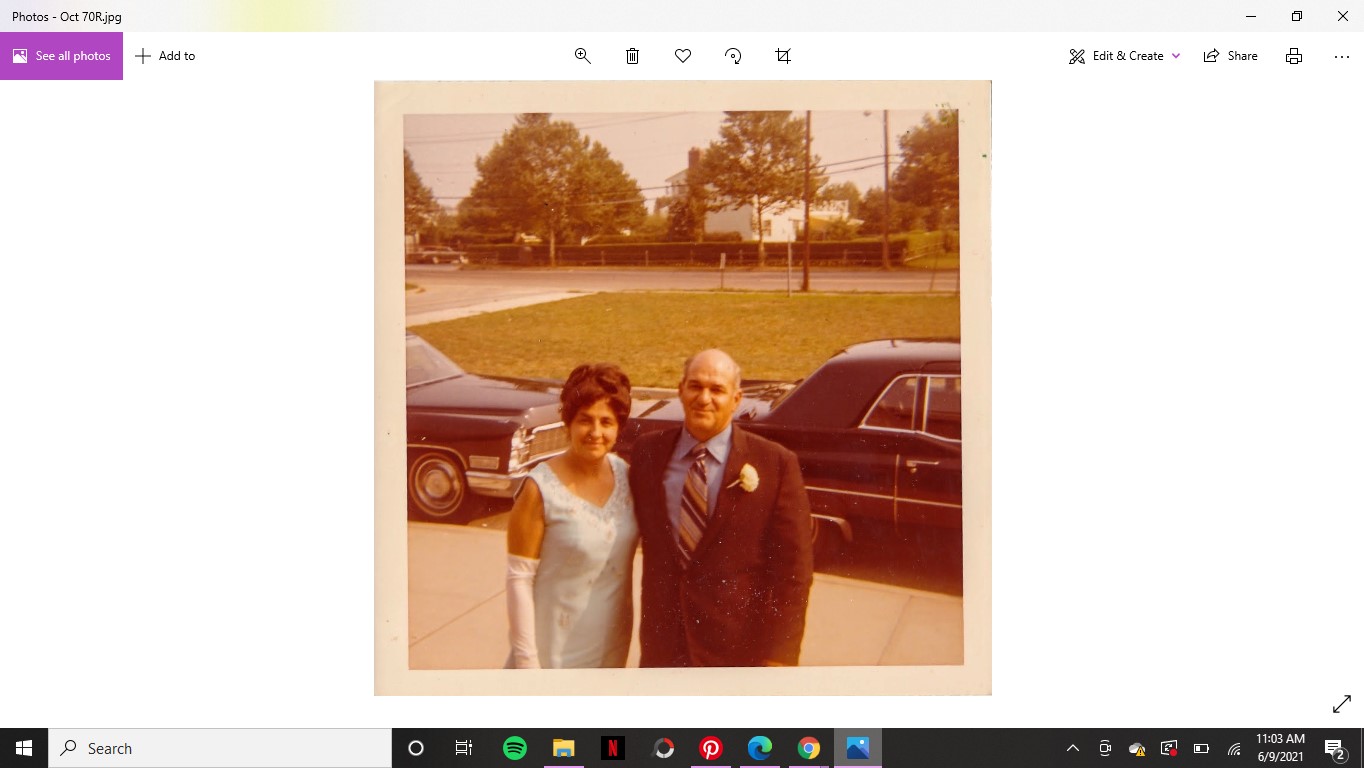 Double-clicking on any image on your PC will automatically open up the “Photos” application on your computer.
Crop & Rotate
The application icon is a blue triangle with a circle behind it. To edit the photo we are going to click on the “Edit & Create” option in the top right corner.
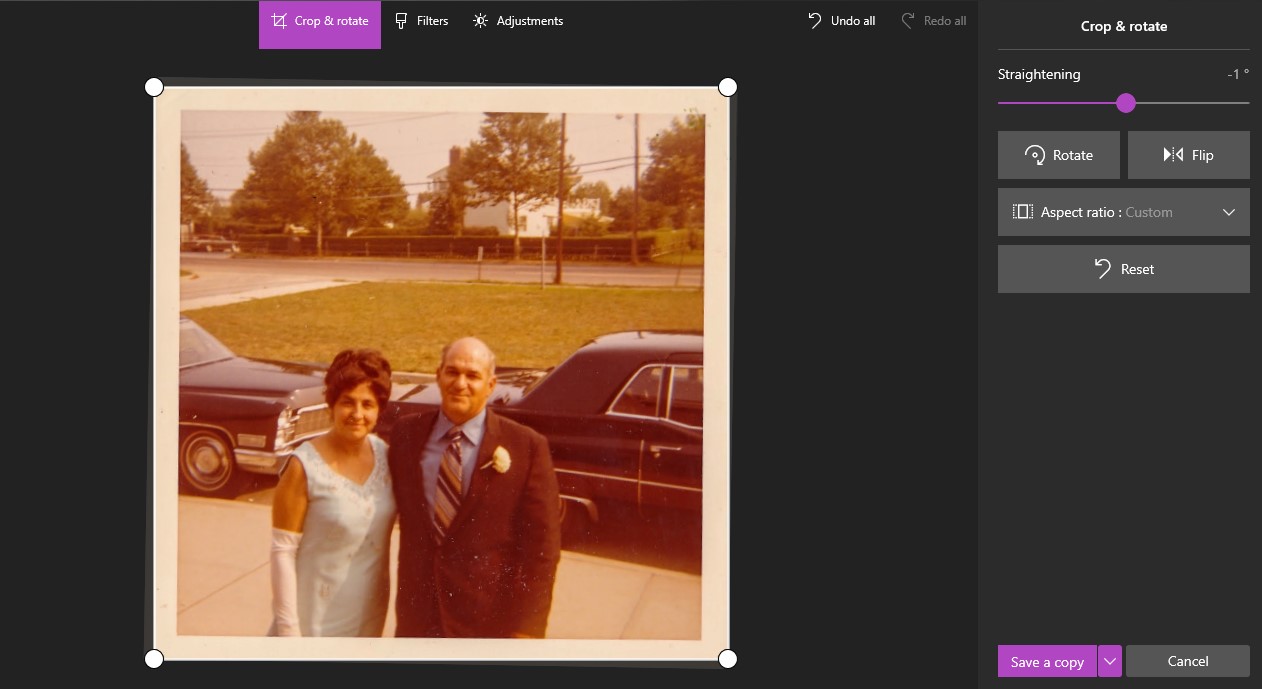
The first tool that will pop up is “Crop & rotate.” Cropping can be used to remove any unwanted part of the photograph. Rotating and Flipping can be used to orient your photo in a different way and straightening can adjust the angle of the photo.
Next we want to go into “Adjustments” – this is where the editing options for exposure and color are.
Light Adjustments
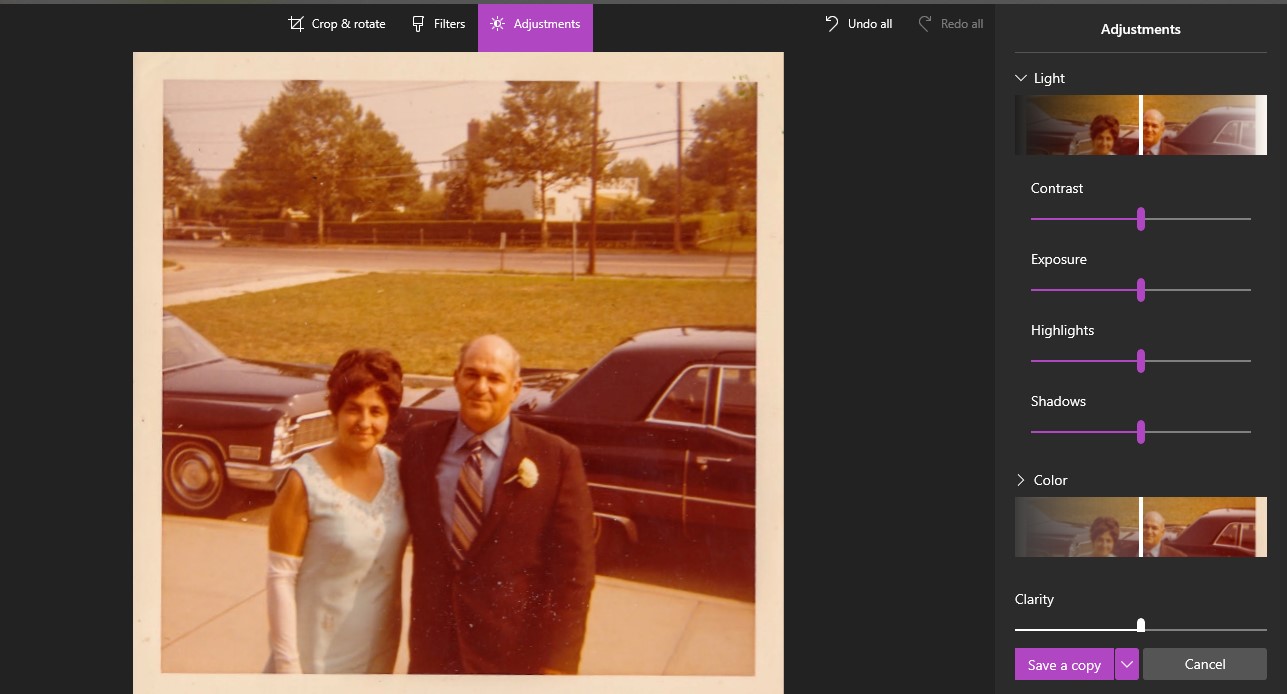
By clicking the arrow next to “Light” adjustments are split into:
- Contrast: makes darks darker and lights lighter, which adds depth to your photos
- Exposure: increasing exposure make your photo brighter, decreasing will darken it
- Highlights focuses on the bright areas of the photo, which can be made lighter or darker
- Shadows focuses on the bright areas of the photo, which can be made lighter or darker
For this image I increased the contrast a few points, slightly decreased highlights, and boosted shadows to be a little brighter.
Spot Fix
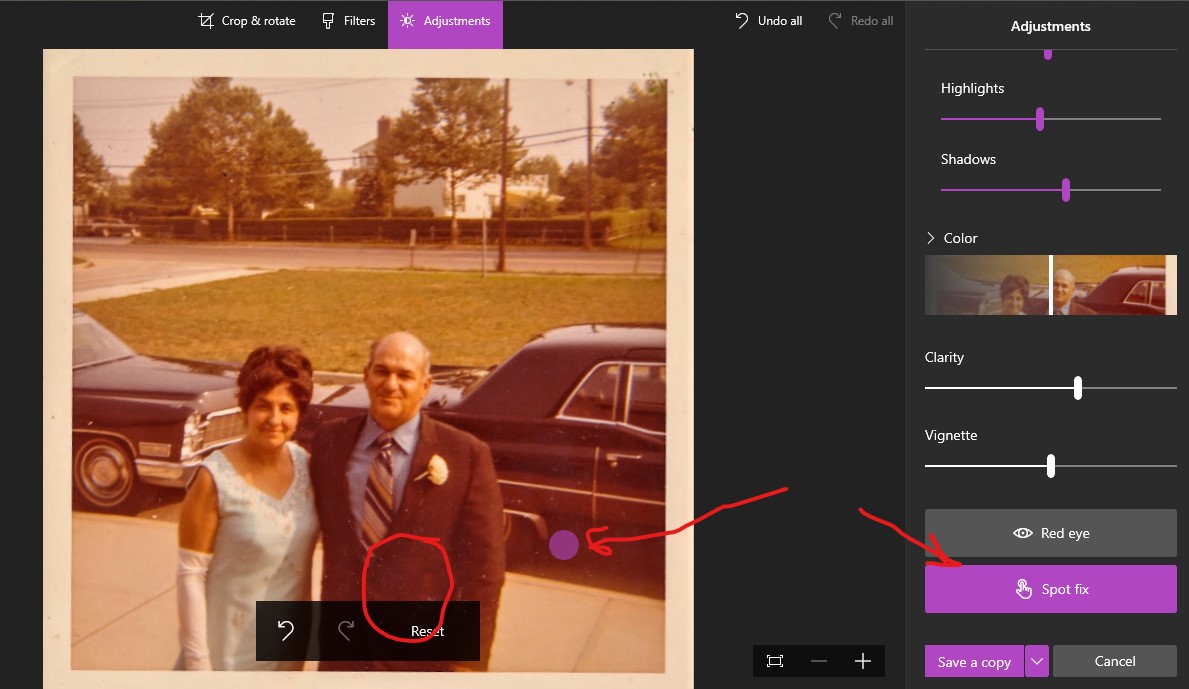
If you scroll down in “Adjustments” you will also see an option for ‘Spot fix.’ This tool will help remove dust or blemishes, which are common on older photos.
Spot fix will give you a dot and wherever you click it will try to fix the blemish in that spot based on the area surrounding it. It doesn’t always pick the right spot so you can use the “-” and “+” in the bottom right to zoom into the spot you are fixing to help the precision.
On this photo, I used this tool to help remove dust from my grandfather’s jacket.
Color Adjustments
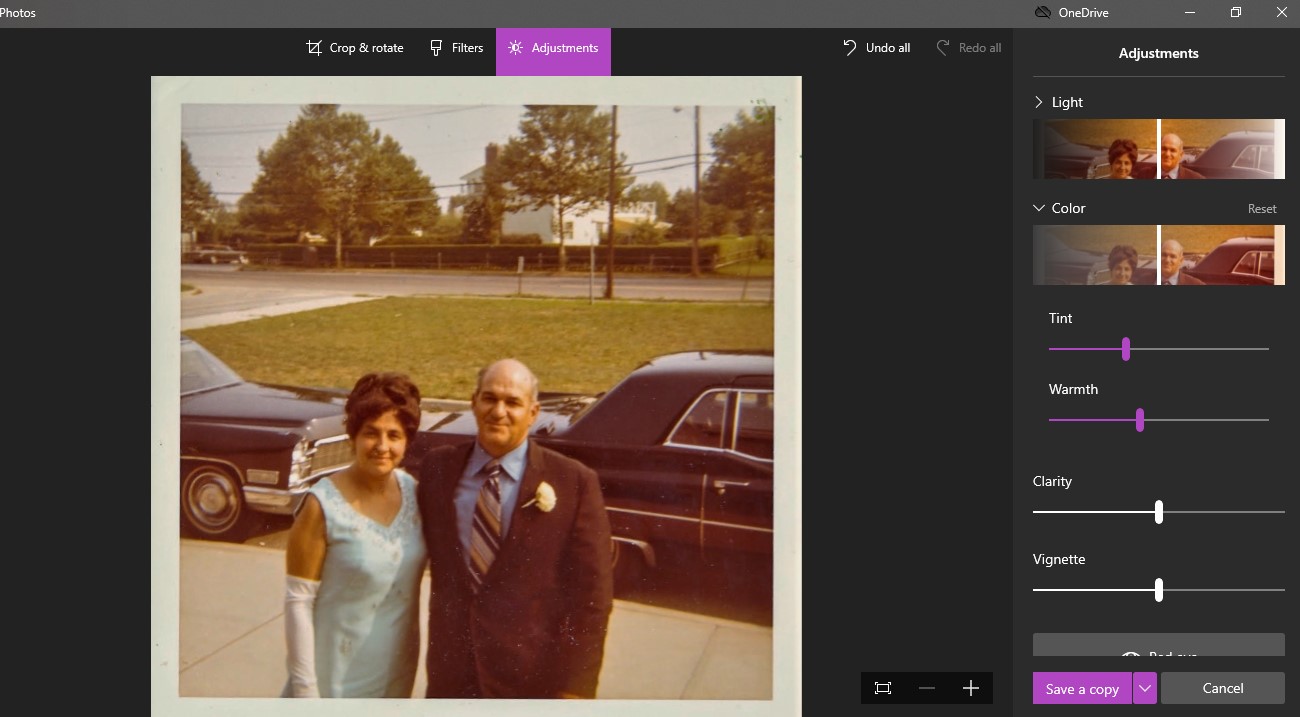
This image is very discolored so we will see the biggest difference for edits in color correcting this photo. By clicking the arrow next to the “Color” adjustments the options are:
- Tint: adjusts on a green (towards the left) to pink (towards the right) scale
- Temperature: adjusts warmth and coolness. Adjusting the scale to the left side gives the image a bluer tone and moving towards the right gives a more yellow coloring.
When it comes to saving it is always important to save a copy of your image and not to overwrite the original file. It is better to have two copies than to accidentally save over the original and not be able to go back to it. Luckily, in the Photo app the default Save option is to “Save as a copy.” Below you can see a before and after, with the original scan on the left and the edited image on the right: